
Hexo添加访客信息和地图
前言
此教程是访客IP信息卡片和访客地图的魔改版本,访客信息原教程可以参考下面这篇教程。
教程
访客信息侧边栏卡片预览

访客信息部分
在
[Blogroot]\themes\butterfly\layout\includes\widget\下创建card_ip.pug文件,并写入以下内容:1
2
3
4
5
6
7
8
9
10
11
12
13
14
15.card-widget.card-ip
.card-content
.item-headline
i.fa-solid.fa-location-dot(aria-hidden="true")
span= _p('aside.card_ip')
.ip_content
= _p('欢迎来自 ')
span(class="p")= _p('未知区域')
= _p(' 的小伙伴')
br
= _p('访问IP为: ')
span(class="p")= _p('未知IP')
br
= _p('浏览器版本:')
span(class="p")= _p('未知浏览器')在
[Blogroot]\themes\butterfly\layout\includes\widget\index.pug中适当位置添加如下内容:1
2
3
4
5
6
7
8
9
10.sticky_layout
if showToc
include ./card_post_toc.pug
!=partial('includes/widget/card_hitokoto', {}, {cache: true})
+ !=partial('includes/widget/card_ip', {}, {cache: true})
!=partial('includes/widget/card_recent_post', {}, {cache: true})
!=partial('includes/widget/card_ad', {}, {cache: true})
!=partial('includes/widget/card_newest_comment', {}, {cache: true})
!=partial('includes/widget/card_categories', {}, {cache: true})
!=partial('includes/widget/card_tags', {}, {cache: true})编辑
[Blogroot]\themes\butterfly\languages\zh-CN.yml文件,在aside处添加card_ip:访问用户信息:1
2
3
4
5
6aside:
articles: 文章
tags: 标签
…………
card_toc: 目录
+ card_ip: 访问用户信息在主题配置文件
_config.butterfly.yml的aside处添加card_ip配置项:1
2
3
4
5
6aside:
…………
card_hitokoto:
enable: true
+ card_ip:
+ enable: true在
[Blogroot]\themes\butterfly\source\js\下创建ip_content.js,并添加如下内容:1
2
3
4
5
6
7
8
9
10
11
12
13
14
15
16
17
18
19
20
21
22
23
24
25
26
27
28
29
30
31
32
33
34
35//获取当前IP地址和浏览器标识
function getBrowserInfo() {
var agent = navigator.userAgent.toLowerCase();
var regStr_ie = /msie [\d.]+;/gi;
var regStr_ff = /firefox\/[\d.]+/gi
var regStr_chrome = /chrome\/[\d.]+/gi;
var regStr_saf = /safari\/[\d.]+/gi;
//IE
if (agent.indexOf("msie") > 0) {
return agent.match(regStr_ie);
}
//firefox
if (agent.indexOf("firefox") > 0) {
return agent.match(regStr_ff);
}
//Chrome
if (agent.indexOf("chrome") > 0) {
return agent.match(regStr_chrome);
}
//Safari
if (agent.indexOf("safari") > 0 && agent.indexOf("chrome") < 0) {
return agent.match(regStr_saf);
}
}
var ip_content = document.querySelector(".ip_content");
if (ip_content != null && typeof (returnCitySN) != undefined) {
ip_content.innerHTML = '欢迎来自 <span class="p">' + returnCitySN["cname"] + "</span> 的小伙伴<br>" + "访问IP为: <span class='p'>" + returnCitySN["cip"] + "</span><br>浏览器版本:<span class='p'>" + getBrowserInfo() + '</span>';
}在主题文件
_config.butterfly.yml的inject处引入以下内容:1
2
3bottom:
+ - <script src="https://pv.sohu.com/cityjson?ie=utf-8"></script>
+ - <script src="/js/ip_content.js"></script>
- 至此访客信息卡片的添加已经完成,可以先hexo三连看一下效果。但是如果访客地图分开添加的话,两个卡片显得有点多余,所以下面把它们整合到一个侧边卡片里面。
访客地图部分
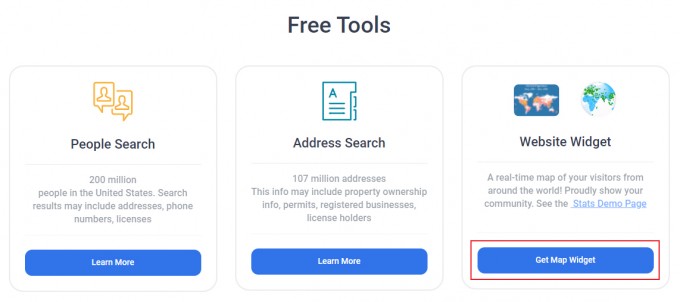
首先去 clustrmaps官网 注册一个账号并登录,(可能需要科学上网),登录之后找到
Website Widget,点击进入。
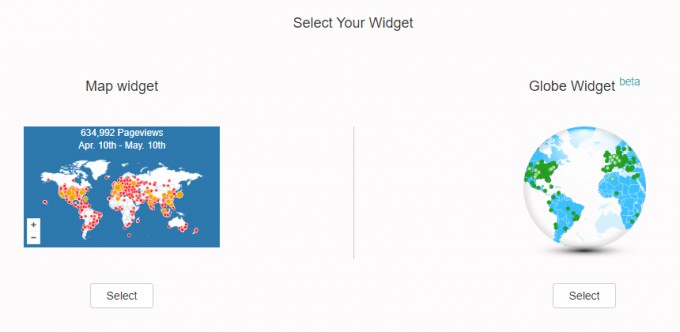
按照提示输入自己的域名之后,选择想要添加的样式,个人喜欢平面的。
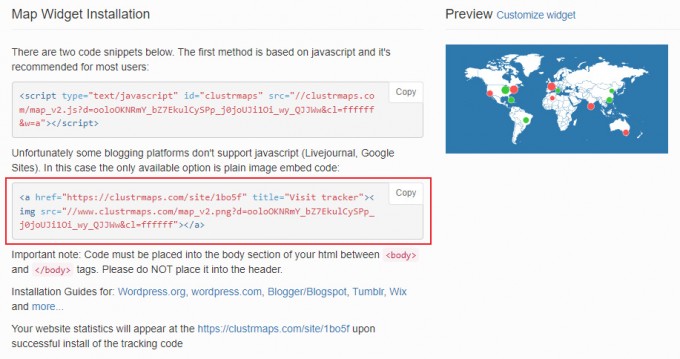
这里就用平面的做演示,选择下面
a标签的形式,暂时不用复制。打开刚才新建的
card_ip.pug,在最后添加以下代码,注意缩进:1
2
3
4
5
6
7
8
9
10
11
12
13
14
15
16
17.card-widget.card-ip
.card-content
.item-headline
i.fa-solid.fa-location-dot(aria-hidden="true")
span= _p('aside.card_ip')
.ip_content
= _p('欢迎来自 ')
span(class="p")= _p('未知区域')
= _p(' 的小伙伴')
br
= _p('访问IP为: ')
span(class="p")= _p('未知IP')
br
= _p('浏览器版本:')
span(class="p")= _p('未知浏览器')
+ a(href=url_for('https://clustrmaps.com/site/1bo5g'))
+ img(src=url_for('//clustrmaps.com/map_v2.png?cl=ffffff&w=300&t=n&d=yJY4lGab-x8oGwLx6dNF9wC1EWohTS8kwsInVOZIu9s&co=2d78ad&ct=ffffff'))
a标签和img标签的链接换成你自己的,就是上面选择的a标签形式里的,不要直接用我的,我这个只是给个参考。- 配置到这里就基本完成了,全部保存后hexo三连看看效果吧。
一些建议
关于地图文字
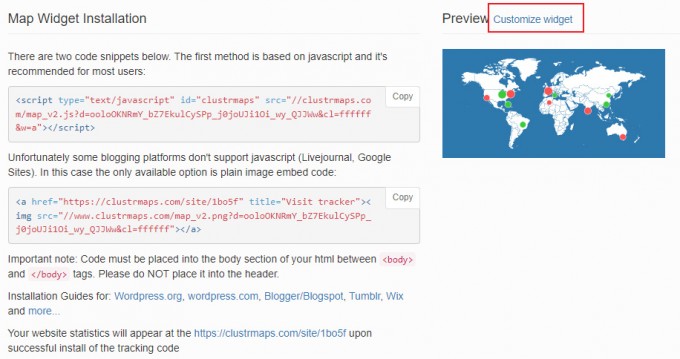
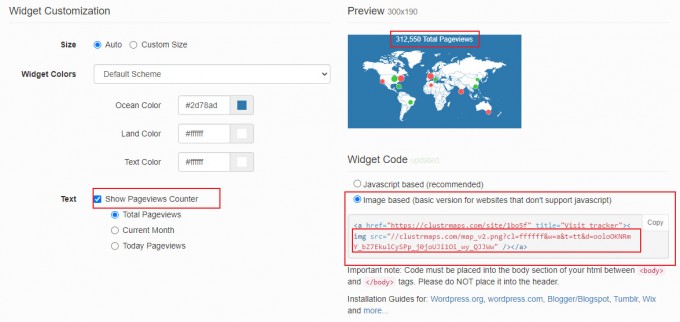
- 地图默认会显示访问量文字,如果不喜欢可以点击
Customize widget进行编辑 - 将
Text的复选框取消勾选,默认并没有勾选,但地图依旧是有文字的,勾选后再取消勾选即可,然后选择右边的Image based,重新复制img中src里的图片链接,将刚才card_ip.pug中的src替换掉即可。
关于地图尺寸
- 默认生成的地图尺寸看着可能会很怪,可以在自定义样式中修改。
在[Blogroot]\themes\butterfly\source\css\路径下新建_custom文件夹,在此文件夹下新建custom.css,并在主题配置文件inject配置项head处引入,如果已经有了请忽略此步骤。1
2
3inject:
head:
+ - <link rel="stylesheet" href="/css/_custom/custom.css" media="defer" onload="this.media='all'"> - 在
custom.css中添加以下内容:1
2
3
4
5
6/*访客地图自适应尺寸及圆角*/
.card-ip a>img{
border-radius: 7px;
width: 100% ;
margin-top: 5px;
}
后记
- 访问信息的IP使用的是搜狐的接口。
- 如果访问的时候使用了梯子,地图可能无法加载,关闭梯子即可。
- 如果遇到啥问题或建议欢迎评论。
- 教程写的有些仓促,有错误的地方欢迎留言。
相关推荐


评论